Vinyl flooring is durable, easy to maintain, and available in many attractive colours and designs. It is an ideal flooring solution that quickly and relatively inexpensively creates a beautiful appearance. However, fully gluing down vinyl floors requires prior handyman experience, and dismantling them later can be a real challenge. That is why click vinyl is one of the best inventions in the world. No flooring is easier to install. To ensure your project is a success, we show you in this article how to avoid mistakes when installing vinyl flooring.
Content
- 1 Preparation is Key
- 2 The Importance of the Operating Climate
- 3 Become a Quiet Walker
- 4 Keep Your Distance: Important for Vinyl Too
- 5 Don’t Go Too Thick
- 6 Buy Wedges
- 7 Lock or Drop Down?
- 8 Vinyl Planks Must Be Offset
- 9 When Nothing Moves Anymore
- 10 Gaps Without Fixation
- 11 Read the Instructions to Do It Right
- 12 Experience the best service with planeo - because you need it!
Preparation is Key
Vinyl is soft. Anyone who has ever felt the material knows this. This material property gives vinyl floors a very pleasant feel underfoot. On the other hand, every unevenness in the floor is reflected on the vinyl surface. Therefore, it is essential to meticulously smooth the subfloor before installation. The perfect base for vinyl installation is dry, clean, solid, and absolutely smooth. This means you cannot install click vinyl on a carpet. Due to its flexibility, unsightly gaps would form between the vinyl planks over time. Also, carefully examine old tile and wooden floors as well as screeds. While vinyl can be laid on these surfaces, if tiles or wooden planks have settled or the screed has small holes, you cannot avoid filling these uneven areas. The flatness tolerance is a maximum of three millimetres over one metre. This means that over this distance, parts must not deviate more than three millimetres from the overall level. Exceed this tolerance, and the manufacturer's warranty for your vinyl floor will be void!
Caution with New Screed
Why caution? It was mentioned that the floor should be clean, solid, and perfectly smooth. These qualities are delivered with new screed freshly installed. But one word is missing: the subfloor must also be dry. There are defined values that can be checked with a CM measuring device. Cement screed must show a residual moisture of no more than 2.0 CM %. For anhydrite screed, the tolerance limit is 0.5 CM %. If you lay your vinyl over underfloor heating, you must deduct 0.2 CM % from these reference values.
The Importance of the Operating Climate
The vinyl is here! Properly packaged, with suitable impact sound insulation. Your floor is prepared. The tools are ready, and you can’t wait to get started. But that would be a mistake. Think about how many different climate zones the material has travelled through. First in the cool warehouse, then perhaps in a sun-hot lorry. Now in your home climate zone. In the rooms where it is to be laid, let it rest for 48 hours at temperatures between 15 and 25 degrees. Vinyl that is not acclimatised or acclimatised too briefly will form gaps and warping after installation.
Become a Quiet Walker
Under vinyl, an impact sound insulation is necessary. Some vinyl plank products already have this insulation integrated. But in most cases, you have to lay it yourself. Most manufacturers of click vinyl offer suitable impact sound insulations for their products. Use this option, as it prevents you from laying the wrong subfloor and thus voiding your warranty claims. If there are no manufacturer’s specifications for the insulation underlay, you have a choice between products made of plastic, cork, or wood fibres. Never buy soft, cheap foam. This subfloor is too yielding. Impact sound insulation is available in rolls or sheets. It is always laid fully, with the rough side up and perpendicular to the laying direction of the vinyl planks.
Keep Your Distance: Important for Vinyl Too
Wood works, they say. Vinyl does too. The material is not naturally grown; but its soft, flexible nature makes it susceptible to temperature fluctuations. When the sun shines into the room, when it gets very warm, it expands. This is not a problem - but it needs space to do so. Therefore, you must maintain an expansion gap of at least five millimetres from all fixed structures. If you forget this gap or it is too narrow, your new floor covering will wave when it warms up. This is particularly common under radiators.
Internal Distances Too
The expansion gap to the outside, to the walls, to the kitchen island, and other obstacles - that makes sense. What is often forgotten: even internally, within the vinyl surface, expansion gaps are needed. This occurs whenever a vinyl floor covering reaches a size of eight to ten metres. The exact reference value can be found in the installation instructions from good manufacturers. If you lay your vinyl floor on screed and this screed has an expansion joint, you must transfer this joint to your floor.
Don’t Go Too Thick
Scraping doors or those that no longer close - and constant wear marks on the vinyl: This can happen if you ignore the build-up height of your new floor covering. This height consists of the thickness of the vinyl plank plus the impact sound insulation. Measure or check if there is resistance anywhere. You can compensate for smaller snags by placing special washers - known as shims - on the door hinges.
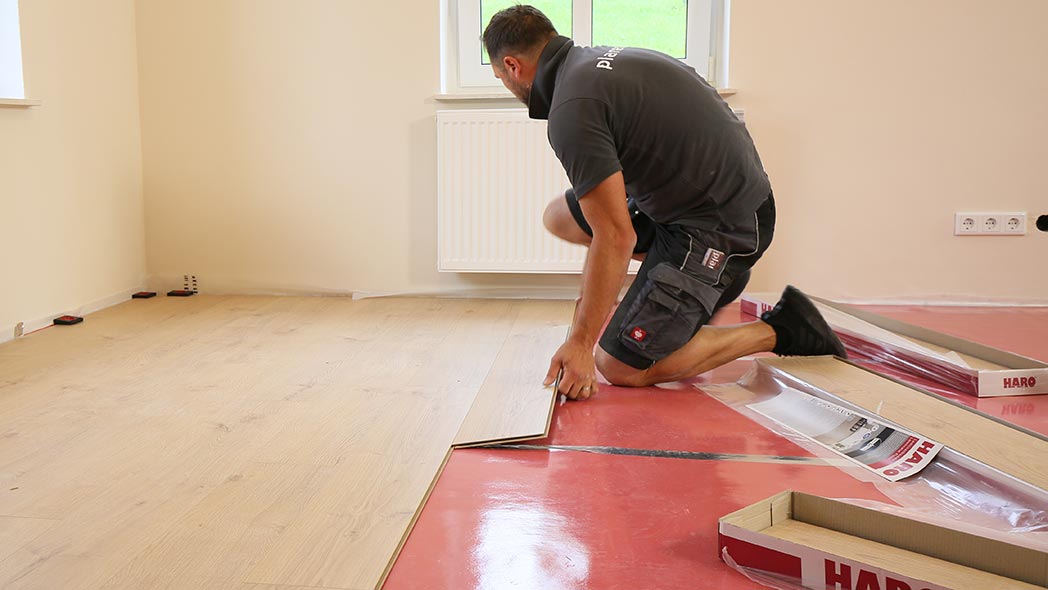
Buy Wedges
Laying the first and second row of vinyl planks without wedges? - That is neither fun nor effective. First, many walls are not absolutely straight. Second, the first row laid constantly slips if it has no uniform support against the wall. This support is created by placing the wedges along the wall and working the first row of planks nice and straight along them. When clicking in the second row, you can then apply force because the first row is held in place by the wedges.
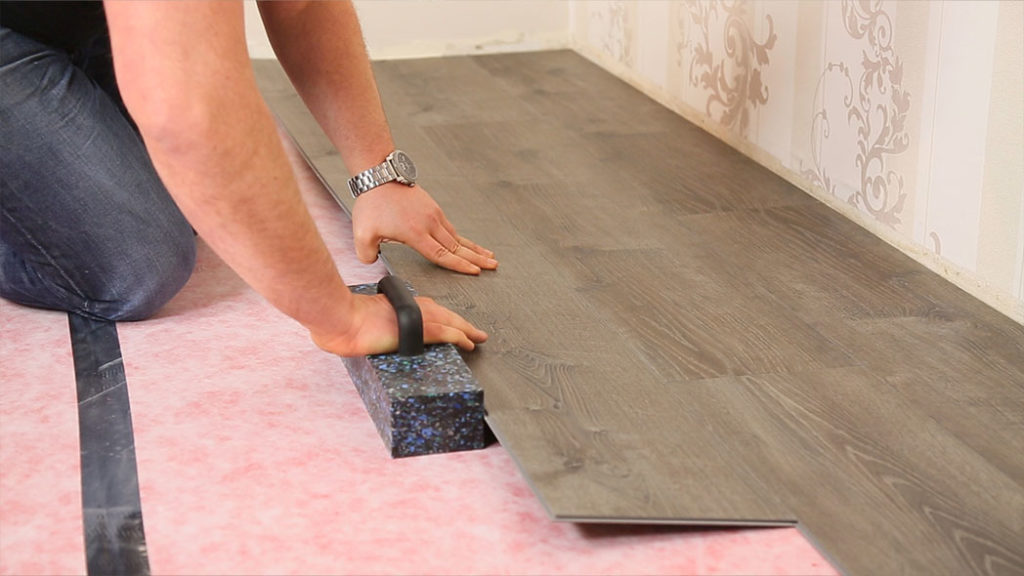
Lock or Drop Down?
Do not rely on your school English here, because this is technical jargon. The English terms describe the type of click connection of your vinyl planks. The lock connection is fixed at an angle from above into its counterpart. The drop-down connection, on the other hand, is laid flat and then locked in place with gentle blows from a rubber mallet. If you try to fix lock connections with hammer blows or to insert drop-down connections at an angle, you will destroy the connection points.
Vinyl Planks Must Be Offset
This does not mean: As wide gaps as possible must form. Rather, the ends of the planks in the following row should always be 30 centimetres apart. Professionals also speak of the "offset" of the individual rows. If these seams are too close together, gaps can form in the floor under sunlight, load, and heat.
When Nothing Moves Anymore
First lay the vinyl floor and then place the super heavy kitchen island on top? - Bad idea. This heavyweight fixes the floor over a larger area, while the vinyl around it can continue to expand and contract. These tension differences can lead to warping and gaps. It is better to first set up the kitchen island and lay the vinyl planks around it.
Gaps Without Fixation
Fill the expansion gaps in the bathroom and around fixtures with silicone. Before pressing the silicone into the gap, place a PE cord there. This trick keeps the gap flexible - because without the cord, there would be an adhesion between vinyl, the fixture, and the floor. With the cord, the play at the floor is maintained.
Read the Instructions to Do It Right
In this article, you have received valuable hints that will make your vinyl floor project a professional success. But that does not mean the study is over. Very important: always read the installation instructions from the manufacturer of your vinyl floor. These instructions are provided by serious producers with the well-packaged material. They are written in an understandable way and give you all the guidelines for proper material handling. If you follow all the rules and reference values and there are still complaints, the manufacturer's warranty will cover it. If you disregard the installation instructions, the warranty will be void. Here, as in most of life: Being able to read (and follow instructions) is an advantage.
Experience the best service with planeo - because you need it!
No matter what challenges you face with your project, planeo provides you with the right solution. Benefit from the advantages of our services:
- Free samples⁴ for many of our products: Order up to 7 samples at no cost, for instance, of our vinyl floors, click vinyl, adhesive vinyl, or rigid vinyl.
- Express delivery² - for urgent projects and quick decisions.
- Expert advice¹ - We offer professional consultation through our contact page or answer your questions directly in the comments.
These topics might also interest you
Repair Vinyl Flooring in 3 Steps – How It Works