
Photo: Iriana Shiyan / stock.adobe.com
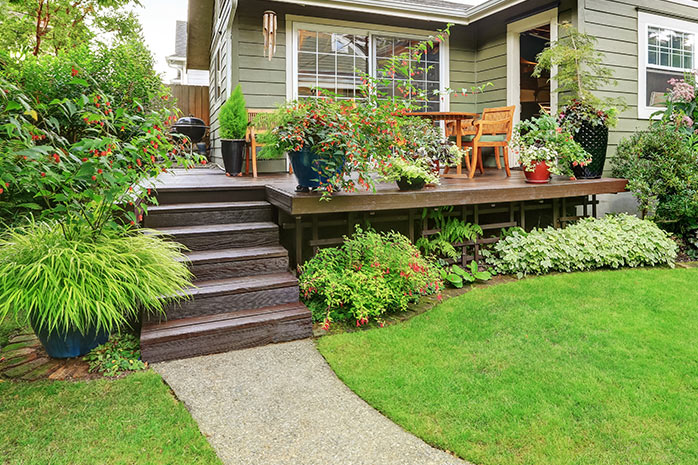
What could be better than spending warm summer evenings with family, neighbours, or friends on the deck, enjoying free time with a cool drink? However, outdoor spaces are not always at the same level as the house. Especially if the house is on a slope or the living area is on a raised floor, a deck may initially seem difficult to achieve - but not impossible. A raised deck can be the ideal solution. By building a raised deck, you can balance small and large height differences between the ground floor and the outdoor area, thus visually expanding the living space. This is also true when the outdoor area slopes sharply or is near a water surface. In flood-prone areas, the deck is protected from water and mud, allowing rainwater to drain easily through the gaps.
Moreover, a raised deck offers additional advantages: unlike a balcony, the connected stairs lead directly from the deck to the garden. You can also use the space beneath the raised deck as additional storage space, for example, to store lawnmowers, garden tools, and more.
Content
What is a Raised Deck?
A raised deck, also known as a deck on stilts or an elevated terrace, is a deck that "floats" a certain distance above the ground. It is supported either by a fill or a sturdy frame structure, carried by massive wooden or metal support posts.
If you want to build a raised deck yourself, you should consider a few important aspects in advance. These include whether the property is on a slope, how high/large the deck should be, what a good substructure looks like, and what steps to follow during construction. We have compiled the most important information and tips on "building a raised deck" here for you.
How High Can You Build a Deck?
The purpose of a raised deck is to compensate for any height differences to the house. Therefore, the height of the deck is generally specified. As a freestanding structure, a raised deck requires planning permission if it exceeds a height of 50 cm. According to building regulations, the raised deck must also have stairs with handrails and balustrades. Check with your local planning authority for any additional regulations that may apply.
How Much Does a Raised Deck Cost?
The costs for a raised deck depend on various factors, such as the area size (m²).
Hiring a professional to build it will cost significantly more than building it yourself. With some DIY skills, time, patience, and a few helping hands, you can take on this project yourself, usually at a much lower price since you only need to pay for the materials. Generally, you have the choice between prefabricated kits or assembling all the construction materials according to your wishes. The latter is often more cost-effective and allows for more individual design options according to your personal taste. It is important that the individual elements meet the highest quality and safety standards.
What Material is Suitable for Decking?
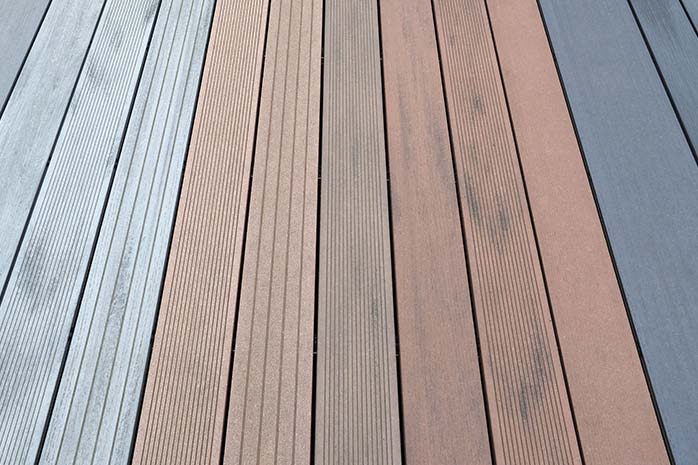
Many people choose wood as a material - and for good reasons. The natural material blends harmoniously into any environment and gives the deck a warm and cosy atmosphere. Given the variety of shapes and colours available, the choice can be difficult.
Here, your personal taste is mainly in demand, but consider the specific properties of different types of wood. Not all woods are equally robust. High-quality woods such as Bangkirai, thermo wood, or the low-maintenance wood-plastic composite WPC (Wood Plastic Composite) are recommended.
Hardwoods such as Bangkirai, bamboo, or Kempas have the advantage of being extremely durable and long-lasting. They hardly warp due to their high dimensional stability and offer a high load-bearing capacity and low swelling behaviour. Softwoods like Douglas fir, pine, or larch have a better ecological balance, are temperature neutral, and very weather-resistant due to their high resin content.
Additionally, wood requires maintenance and must be treated regularly with wood stain or oil. Some types of wood, such as Douglas fir, pine, spruce, or fir, need more intensive protection than others, like oak or sweet chestnut. Regardless of the type of wood, it is essential to impregnate the decking boards before first use to protect them from weather influences of all kinds.
An alternative to wood is natural stone or concrete decking slabs, which must be particularly securely supported due to their weight. Therefore, they are only recommended for decks with a total height of 50-100 cm.
Building a Raised Deck: A Step-by-Step Guide
1. Setting the Foundation
The foundation is the basis of the substructure. For this, you need to dig a hole about 10-20 cm deep, which you fill first with sand and then with gravel. The sand serves to level the ground, while the gravel acts as drainage.
2. Constructing the Substructure
The substructure is the most crucial part of the deck, as, together with the support posts, it holds the decking boards and ensures a secure and stable hold. As support posts for the substructure, square timbers with steel anchors are used, which are inserted into the outer four corners and, with the help of a measuring tape and string, at a distance of 1 meter in a depth of 80 cm. Then the foundation is poured with concrete. The support posts are screwed with special U-profiles to horizontal carrier frames. These carry the lattice frame, which can consist of wooden slats or boards. These should be stable, resilient, and durable.
Before laying the decking boards, the concrete must cure, which can take 3-5 days. Shortly before laying the boards, the load-bearing structure is covered with sheets to protect it from joint dirt, moisture, and direct weather influences.
3. Laying the Decking Boards
You can lay the boards either parallel or at right angles to the house wall. If you have chosen smooth wooden boards, you can decide according to personal taste. Other boards should be laid at an angle to ensure good water drainage.
Pay attention to the correct spacing between the boards (e.g., 5 mm) and proceed very carefully when screwing. The boards should be fastened with one screw at the front and back, with the screws ideally in a straight line. Some decking floors are designed to be simply clicked together ("click tiles"). After laying, you should sand down all corners and edges again to remove any protruding splinters.
Tip: Wood needs maintenance. It should be oiled at least twice a year to retain its beautiful appearance and protect it from weather influences. Before oiling, the boards should be thoroughly cleaned.
4. Designing the Deck Area
When designing the deck and its surroundings, your imagination and creativity have almost no limits. Consider special wishes and needs, such as noise or privacy protection. Of course, you can also border a raised deck with a flower bed. Depending on how steep the slope to the ground is, there are various design options.
Small height differences can be easily compensated for with rock gardens or flower or herb beds. You can also create a stepped garden area around the deck and plant pots or flower boxes in various sizes. If there is enough space, raised beds where you can grow vegetables or herbs are also ideal.Important: Do not forget to install stairs with a railing on the deck. This work should only begin once the total height of the deck is determined to establish the optimal number and height of the steps. For both the stairs and the railing, you have a choice of different materials and shapes. It is advisable to match these to the style of the deck to create a harmonious overall look.
Experience the best service with planeo - because you need it!
No matter what challenges you face with your project, planeo provides you with the right solution. Benefit from the advantages of our services:
- Free samples⁴ for many of our products: Order up to 7 samples at no cost, for instance, such as our wooden decking or WPC decking.
- Express delivery² - for urgent projects and quick decisions.
- Expert advice¹ - We offer professional consultation through our contact page or answer your questions directly in the comments.
These topics might also interest you
Cleaning Bankirai Decking: 3 Simple Methods
WPC decking boards test – 7 reasons for TITANWOOD WPC boards
WPC terrace: ideas for a successful design
Terrace ideas: Inspiration and images for your outdoor dream
Building a wooden terrace: Everything about costs, construction and assembly