A new flooring is to be laid in a room. Before starting the installation work, it is important to check the subfloor. In our example, it is a screed. We want to demonstrate what the standards say. What should you look out for? What tolerances need to be observed? We provide information.
Content
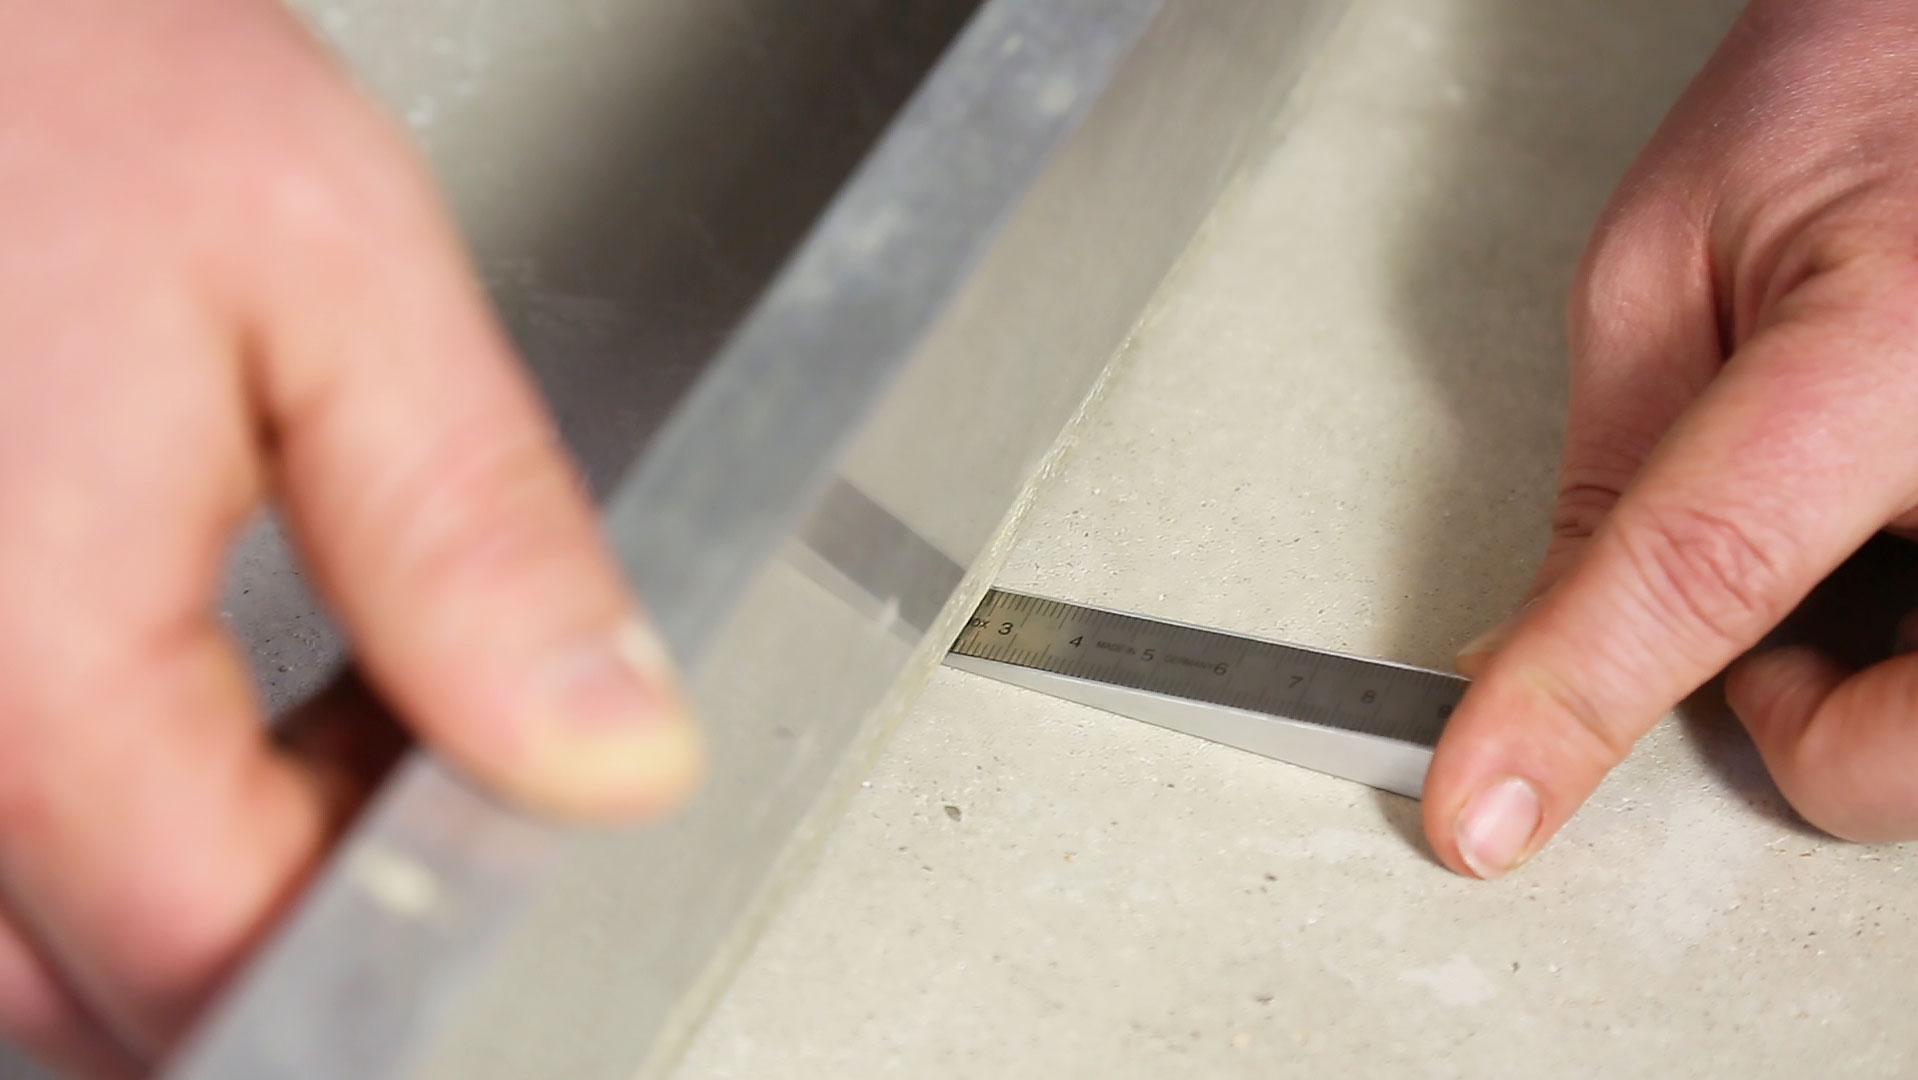
With a Straightedge and Test Wedge
It is important to determine what irregularities or waves may be present in the screed. With the help of a straightedge and a small test material, this can be done quite easily. If a floor is laid without checking the subfloor first, complications can arise later. There is a risk that the floor may move in high-traffic areas. It can also happen that the joints open.
Tolerances and Guarantees
In the event of a complaint, checking the subfloor is an important aspect. For example, if a manufacturer comes to the house and inspects the floor, there is no warranty claim if the subfloor has not been checked beforehand. Therefore, we explicitly recommend taking the 5 minutes for this preparation.
Check the flatness or unevenness of the subfloor with the straightedge at various points. The rule of thumb is:
- For 1 metre in length, the height difference should not exceed 3 mm
- For 2 metres, a maximum of 6 mm is allowed
How do you find out these details specifically? Our recommendation for subfloor checking: straightedge and test wedge. First, place the straightedge on the floor and tilt it slightly. You can then clearly see where light shines under the straightedge. Where no light is visible, the straightedge lies directly on the subfloor. In the areas where light is visible, you can additionally determine with a test material how many millimetres difference there is. In other words, how deep the waves in the floor are.
Accurately Determine Irregularities
Once the subfloor has been checked in various places, you know exactly where the irregularities are. Work from the walls towards the centre of the area. Check with the straightedge in different positions.
Of course, you could also do this by eye. However, checking the subfloor with a long metal ruler gives the necessary insight into the actual condition of the floor. The straightedge makes any potentially hollow areas visible. By sliding the test material underneath, the exact value can also be determined.
We have already mentioned the usual reference value in the tolerance range: 3 millimetres over a distance of 1 metre. In our example, we determine a value of about 2.5 mm. The subfloor can therefore be laid as it is. It is not necessary to use a levelling compound here.
Subfloor Check Secures the Warranty
We have shown you how easy it is to determine irregularities in the subfloor. Measurements were taken at various points in the room to identify where floor waves are present. We found that the tolerance range of 3 mm was not exceeded. The new flooring can therefore be laid without any further subfloor preparation.
However, if we were to find larger waves or bumps, appropriate measures would need to be taken:
- Apply a levelling compound
- Or partially sand down the waves
The specific precautions to be taken must be considered individually. However, the fact remains that no flooring should be laid without prior subfloor checking. We have shown you how to perform such a check in our example. The clear advantage is evident. If you have checked and the values are within the tolerance range, the manufacturer's warranty is secured.
This Applies to Every Floor Covering
A thorough subfloor check is essential to ensure the longevity of your flooring and secure warranty claims. Use a straightedge and test wedge to detect irregularities and meet tolerances. This ensures that your new flooring is installed optimally and lasts a long time.
This procedure is universally applicable, whether you are laying:
- Click-system flooring
- An adhesive variant
- Tiles
- Parquet
- Laminate
- Vinyl
- Or cork floors
If all values are within the tolerances, the flooring will be properly laid, and you will enjoy it for a long time.
Experience the best service with planeo - because you need it!
No matter what challenges you face with your project, planeo provides you with the right solution. Benefit from the advantages of our services:
- Free samples⁴ for many of our products: Order up to 7 samples at no cost, for instance, of our vinyl floors, click vinyl, adhesive vinyl, or rigid vinyl.
- Express delivery² - for urgent projects and quick decisions.
- Expert advice¹ - We offer professional consultation through our contact page or answer your questions directly in the comments.
These topics might also interest you
Installing Vinyl Flooring on Underfloor Heating - A Step-by-Step Guide